Short introduction to operating wires (DB, Germany)
In the old days the signals and points were operated through a mechanical wire system. The operating wires connected the levers in the signal box with the signals and the points. The signalman could operate a signal by moving the corresponding lever up and down. Two wires transferred the movement of the lever to the signal. You can image that this could be a demanding job if the signal stood a couple of kilometres down the line.

The system could only operate over a limited distance and one could find many signal boxes along the line. Large stations and depots usually had signal boxes on both sides of the yard. The signal boxes were interconnected by telegraph and later by telephone to prevent accidents from happening. In The Netherlands, mechanically operated signals and points were replaced years ago. You can still find this classical signalling system in Germany on lines with little traffic.
In miniature
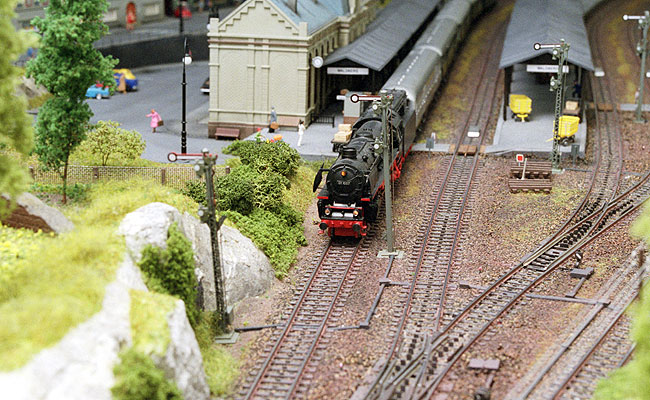
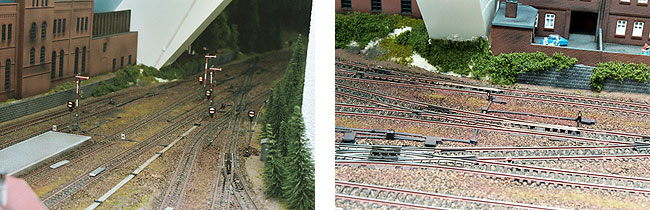
The Deutsche Bundesbahn still relied heavily on the mechanical signalling system in the 1960's. For that reason I wanted to use semaphores in Project Waldberg and I decided to add an imitation of the operating wires. Signal boxes can be found in the station and the depot. Operating wires run from both signal boxes to various signals and points. I created the operating wires with parts from Weinert and Repa.
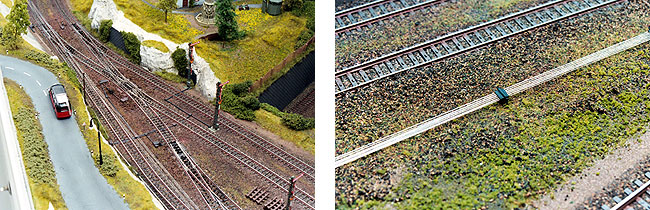
The operating wires would run as much over ground as possible. This method was the easiest and cheapest solution. The operating wires in Waldberg run mostly over ground too. Wherever the wires had to cross a line or an area where staff could walk around, they were guided through underground ducts. The ducts were covered with steel plates. Both over ground and underground wires were held in position by pulleys, which were set about 10 meters (H0: approx. 12 cm) apart. Special pulleys (so-called 'Druckrollen') and corner boxes ('Ablenkungen') were used to negotiate a corner or a curve.
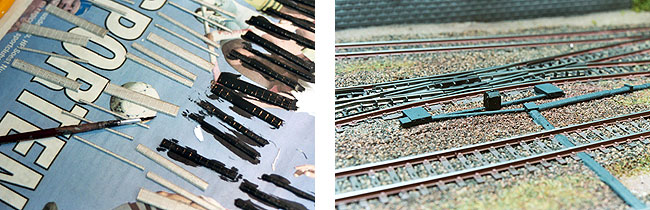
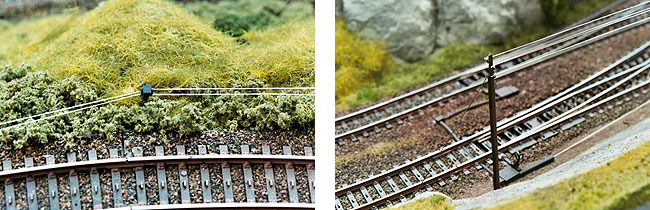
I used rubber wire and pulleys from Weinert for the over ground wires. First you make a starting point and an end point by pressing a row of small nails into the base plate. Then you stretch the wires between the two points. The number of wires depends on the amount of signals and points that need to be operated. There is no real sense in using over 2 x 6 wires on a model railroad.
Please keep in mind that the wires always run in pairs and always run parallel to each other. A small comb can be a great aid for this job. After you have assembled the pulleys, it is just a matter of lowering them over the wires. A small drip of super glue is enough to fasten the wires to the pulleys. Finally you paint the pulleys matt black or anthracite grey. The Druckrollen need a somewhat different approach. You put these down first and then weave the wires through them.
Before ballasting the track
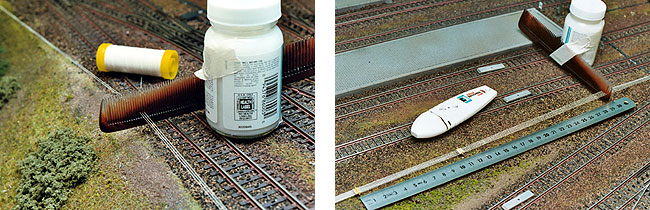
Weinert has the right parts to imitate the underground ducts. The parts are made from white metal and need to be painted first. I used Revell airbrush paint in the colour 'anthracite' to paint the ducts. Anthracite is a bit greyer than plain black and it makes the ducts look worn and torn. You put the ducts in the ballast in such way that the top just sticks out. Since I used the flat Merkur track bed for Waldberg, I glued the ducts simply on top of it. Do not forget to add the pulleys and the Druckrollen at the right intervals.
At a semaphore the wires can just stop at the base of the semaphore. Points are a somewhat different story. They need to be fitted with a big drive box and a small reversing box. Both parts can be ordered from Weinert or Repa. The lanterns are also available from Weinert and can be ordered apiece and as a larger set of 10 pieces. The lanterns I used are non-functional, but can be turned by hand if needed. There are separate kits with drive boxes and lanterns for double slip points. I did not add imitation latches to the points. That would have been a bit too much.
I repainted damaged parts of the ducts after everything had been put into place. Finally I weathered the entire yard by spraying a thin layer of rust over it with the airbrush. This makes the operating wires nicely blend in with the track bed. It is practically impossible to add the operating wires in a 100% accurate manner. You just do not have space for that on a model railroad and the scene soon becomes too full. The sharp curves and short points add to this effect. However it is the overall effect that counts and operating wires add a lot to it.
The subject is elaborate to cover in just one web page. If you are considering to do something with operating wires, I would recommend reding a book first or taking a look at the MIBA Report Mechanische Stellwerke (in German).
2002